Tuesday, August 7, 2012

Fly away with Lucy


My baby girl just turned 3. I find the younger parties to be  wwwaaayyy more fun.Those years when your kids don't really have "friends" yet so I invite all my friends to act as their friends and have a kid/adult party. Then they start school and want to invite their own friends and boot your friends out! What is up with that!??

This year I went with a vintagy hot air ballon-ish theme. I found inspiration on pinterest of course! How can you not find inspirations and  then feelings of guilt for not having enough time to do everything you pin on pinterest!??!! OK back to inspirations...

Here is where I started. found here ( gotta give credit to those who inspire you!)

Antique 3D Paper Hot Air Balloon Mobile

And this too. Love the pastel.. ( find the blog here, great put together parties!)

This was my favorite! I wish I had the dollars and the time to put somthing like this together!

Pinned Image

Pinwheels have been making an appearance at many a party I have been putting together lately!
DIY instructions here.

Pinned Image

I adore this wedding invitation! I would so get married again just so I could send these out ( oh and wear a wedding dress again, and get fancied up again, and get lots a presents again, and have a day dedicated to me ( and the hubs) again !

..

okay I totally did these at the above mentioned party for said 3yr old...NO one used them, I guess they either didn't get it or were afraid to break them! luckily Iam a big canner so now I have extra jars. Note to self.... Blog for info found here

Pinned Image

OK this cake..UMMMM yea right! In my dreams I could make this cake. But what a fun idea! More info Found here

hot air balloon cake - Sooo sweet!

So are you ready for my version of all of my inspirations??!! OK here ya go..

Here is the invites. Hand painted by yours truly on Saturday night when I had nothing better to do. I used the Bi-fold format like the wedding invite above.


Here is the inside of the invite. I always like to include a current picture because I send these out to family that I know probably cant make it so they can have a updated picture.


My Hot Air Balloons, Carefully crafted by me and a lovely friend that offered her day to help me make them.


Accompanied by clouds and more balloons. Of course I neglected to take pictures of my front entrance that was wonderfully decorated and the back yard that I worked on all week to look presentable! I was kind of in a haze I admit.


Here is my cake.In case you were wondering i am not a cake decorator, but I am a person who thinks I can do everything. Then when things don't turn out quite as I want I realize Sometimes you have to just go with it. it is what it is, as they say. But I think the flag garland really helped make this cake cute and not look lop sided and crazy..

Here again is another example of me thinking I can do everything myself! If you have ever seen cookies like these online ( etsy etc.) they are like $3 a pop. So I of course say to myself " self,  i can do that"  but the question is did it  cost me less money and how much time did it take. It was in no way easier for me to make these myself. And even with cheating and buying pre made frosting and a package of sugar cookie mix and a mom helper who rolled, cut and baked them for me It was a messy and stressy ordeal to make those cookies. But they were very popular with the party guests and went quickly. So I will not cross them off the party to do list yet, just make sure I or you if you are thinking about it have PLENTY of time to spare to make them.

Oh yea had to get creative with the cookie cutters, no hot air balloons. So I took one that looked like a balloon and a square cutter and pinched them together.


Here is the happy birthday girl checking out her cake.


She loved all the attention!


But what girl doesn't love having all eyes on her!?!


And once this day was done I think to myself..Self , next time we are going to start early, plan ahead and not get stressed out! I will let you know how that works out!

Thanks for Looking ~ Bianca


Tuesday, May 1, 2012

I said it and I meant it!

 If you happen to follow me on pinterest I have a board called " I will start quilting" . I just need to put it out there that I have started...

Here are some of my blocks


This one is my favorite, didn't think  I would like the solids so much but I am for sure ( when I get done with this guy) going to do my next quilt all in solids.

This block pattern is called a wonky log cabin and I got the idear from this book here. I love the wonky sewing style. This is a pattern where you can use up scraps or burn through your stash. I like to sew but I also like to hoard fabric! I see it I like it I buy it! I never have a project in mind when I buy fabric, I know this is wrong sometimes because if you start a project and run out you are in trouble. It has happened to me and it is not nice! But so far it has worked. These blocks were made by using pieces from my scrap bin that I then added to from my stash cupboard to give my self a little more to play with.

I wish I knew more people who quilted so I could start a quilting bee/circle/club but this may be an adventure I go alone with the help of other wonderful bloggers who I follow.

Here are some other books I have or are in my shopping cart on amazon that I am itching to try.


In my cart but I looked through this at the fabric store and I NEED TO HAVE!


have this one and all patterns are square, no triangles, no hexies all sqaures and stright lines cant get any easier!


One of my favorite quilters I love her modern designs and just beautiful quilts!


This one jsut came out, I follow the author and love her blog.

I am hoping to get this done soon,the hubs just mentioned I owe him a blanket ( short version..started a crocheting a blanket while pregnant with first child who is now 12..not done yet...) So maybe for fathers day!?!?!?

~ Bianca

Sunday, April 22, 2012

Let there be salad..

Happy Sunday! Well I guess not so happy since tomorrow is Monday! And it has been one hot weekend here in the central valley!! UUgh I hate it! But since  this summer time weather has forced it's way into my life it is time for some BBQ! I do love utilizing my BBQ on hot evenings when the thought of turning on the oven makes me feel faint.

I wanted to share with you all a little yummy I tried tonight and it worked out MAGICALLY!
I have tried this before but the result were not so favorable .....


Iam a big fan of the Buffalo Chicken Salad from Chili's. Chili's is our normal family place for the occasions that we take the kids out. If its just me and the hubs we usually go a little more fancy ( but not to much, that would involve to much work getting fancied up!) I am the kind of person that always orders the same thing at each restaurant I go to. I do not like to try new dishes, every time I do I hate it!. This is not the scenario at home, I love to cook and I am always trying new dishes, but at restaurants I always get burned when trying new food.

So here getting back to the point. I love this salad. It has spice from the buffalo seasoning and creamy from the ranch, corn chips .. well here is a run down of ingredients from the Chili's website

"With applewood smoked bacon, bleu cheese crumbles, tortilla strips, house-made pico de gallo and ranch dressing."

After the 1000 time ordering this salad, I had to try to make it on my own. As noted above I did try once to make the fried buffalo chicken and lets just say No Bueno... So this time I opted to make grilled chicken


And here is my version. I used a recipe from food network for the chicken ( you can find it here) It was a Bobby Flay recipe that I tweaked just a bit. I believe he was using chicken breast with the skin on,  and I just used frozen tenderloins that I defrosted and seasoned as instructed, but when cooking on the BBQ I basted with the marinade on both sides. Here is a run down of my indigents

1. Bag of Salad, I like the 5 lettuce blend so you get some of the darker stuff in there instead of just iceburg.
2. A few Tortilla chips that I crumbled up
3. 1 tbs. Bleu Cheese crumbles
4. Some Ranch made from the packet, Which I think is way better than the stuff in the bottle. Plus I used LF ingredients to make..
5. Cant make a Chili's Copycat dish with out my Chili's Copy cat salsa ( you can find that recipe here also !)
6. Avocado
7. Tamed Jalapenos ( TAMMED because if not those suckers are hot!!)
*8. Insert tomatoes here, I didn't have any but I would have if I did. But the salsa made up for the lack of tomatoes.


Here is a close up!!

For me this definitely hit the spot! I'm not going to say I do not have to go out to get this anymore but this is for sure going into the dinner rotation. I wish I had a calorie count to give out, but I am almost 100% positive that the homemade version has to be better. The chicken it grilled not fried. The portion size was more in line with what one person could/should eat. And I used less dressing and the LF version of said dressing... Yea dont you think??!! 

Try this out for sure I think you will love it, and please let me know what you think I would love to hear your comments!

Hope each and everyone of you have a great week!

~ Bianca

* found a calorie count for the Chili's version on my helpful fitness app on my phone. The Chili's version can be anywhere from 800-1000 Calories! Yikes. I calculated mine and it runs anywhere from 400-500 cals depending on how much of each ingredient you use. Also I forgot to mention I omitted the  heavy cream cream and creme fraiche sauce in the Bobby Flay recipe because I didn't want the extra calories and I planned on using the ranch.. Hope that helps!


Sunday, April 1, 2012

Bathroom Redo.

We all know the saying while the cat is away, the mice will play. I live by that saying!  For work purposes my husband has to leave town once or twice a year,  this is the time I choose to play. Not that I cannot do projects while he is here, I just choose to do them while he is gone because I can take as long as I want, do it however I want, tape off or not..basically no super vision. No "your doing that wrong" etc. etc... ( *disclaimer..my husband is very helpful and a supportive DIY'er and in no way am I saying he does not help or support my endeavors...just sometimes I like to be left alone! lol)

OK y'all here is what I did while he was literally on the other side of the planet ( he was forced to go to Australia..boo hoo for him!) and had no idear of what was going on at home.

My "Master" bathroom. My house was built in the 60's so this bathroom is not really the "Master" , it just gets that name  by technicality because it is the closest to my room which I really cant call the "Master" either because the room my two daughters share is about the same size...But I digress..


OK master bathroom, remodeled roughly 7 or 8 years ago by yours truly.This bathroom was classic 60's with pink and brown tiles. I'm pretty sure at some point the shower was redone before we bought this house,  but the counters and pink toilet were left for me to enjoy.


This was a low budget remodel and the only cost here were new tiles, paint, sink, fixtures, and shelving that Mike made for me and staining the existing cabinet. We got the toilet for free because at the time my in laws were also remodeling their bathroom and they gave us their gently used toilet.


I chose a honey onyx tile, in a tumbled finish ( not really shinny) The tile has shades of  honey yellow, brown, grey and off white. At the time I was new to this whole home decorating thing. This is my first home and I think I got lucky that 8 yrs later it was only the paint color that I was dying to change. I have gotten a lot smarter about my color choices for long term items such as tiles etc. For the wall color I chose a nice neutral green shade called withered moss ( Valspar brand @ Lowes) . I used all middle shade of the swatch for the ceiling (fennel splash) and the lightest shade ( ginger sugar) for the trim. I actually used the trim color through out the whole house. Its a nice off white'ish color.

* disclaimer #2 ..I do try to stay away from trends, that is I have heard it is smart to stay away from trends because they are constantly changing, BUT I saw this in a magazine ( what I am about to reveal..my new bathroom..)  about a year ago and it has been eating away at me since then.. I HAVE BEEN DYING TO DO THIS... It has been sitting there, in my noggin tempting me, egging me on, saying HI every once in awhile when I have a free moment ... I tried to go online and find my inspiration picture from CB2 but of course it was no longer available. I always wait to long to catch the trend train,LOL! OK are you ready.. here it is, my new bathroom color


this is a really dark picture but I think you get this idea. Its grey!! I love it, let me tell you why. The inspiration room I saw on CB2 was actually yellow with grey accents. I thought to myself..self you have yellow tiles you can add grey to it and get kind of the same effect. That is why I chose grey. I know its pretty trendy right now, but it fits in with my existing color scheme of  blues, greens, and browns so I went for it. Here is a little better shot.


This color is called Elephant skin and is the Behr brand from Home Depot ( and I spent way to much time there during this project!) OH OH! My mirror, my love!! Mike and I went to L.A for a weekend getaway awhile back and the hotel we stayed in had one of these mirrors. You can guess the rest, I feel in love and had to have it and here it is! It is in the perfect spot for make-up application, and no more leaning over the counter to make sure things look right!


The wall color matched perfectly with they grey shades in the existing tiles...

 Wait I am forgetting to tell you the drama and low point of this simple redo.. OK, not sure if this happens to you, but never fails to happen to me. There aways has to be some sort of project drama that makes you regret the whole crazy idea.. Here is my drama cut short because I don't want to bore you.. 
 1. I choose 5 samples and paint on wall, had favorite but thought it might be to dark for small room
2. Went with second favorite, bought quart because small room and was buying the 1coat paint.
3. Ran out of one coat paint, not sure why, but did and had to go get more.
4. Finished painting and waited a day to dry and put room back together..
5. Paint dries and for some reason is giving off a purple tone?? asked son what he thought ( with out hinting that I though it looked purple) and he said what I didn't want to hear PURPLE..
6. Go to Home Depot and buy 1st choice of paint and repaint bathroom!!!


I have been collecting the milk glass, and they worked out splendidly in here


I started this guy awhile back with letter stencils from the dollar store,  I just had not finished filling in the letters with paint. I used water color to do this and it gave that perfect weathered/aged look I was going for. I see a kind of green tint in these pictures, it is so not the case in person!

Built in shelves, more milk glass, a painted wooden box cabinet thing from Ikea that I have had forever that contains my makeup and necessities.


And Voila there you have it! Did the Hubs notice, after a minute or two. I painted his office to ( pictures to come ) so that was the first thing he noticed. I might have mentioned other surprises which sent him on a scavenger hunt around the house looking for what I had done while he was gone. He noticed the new mirror first then realized the paint color. Boys are so funny about noticing the obvious some times!

So what do you think, I love it! So happy every time I go in there. Will post pictures soon of my other " while the cat is away" projects.

~ Bianca

Monday, March 12, 2012

Camera Tutorials


I have  been seeing here and there, some Camera help tutorials on Pinterest. I pinned the ones I thought looked good but had not really paid attention to them until the day that I finally decided to read one! BLEW MY MIND at how easy the tutorial was and how much sense it made. Don't you just love that feeling when something FINALLY makes sense!

To start off I have read the manual for my camera, I have a Nikon DSLR D70s {pictured above}. I love my camera, I works/ does what I want it to, and I have only broken it twice at the  total cost of I could of bought a newer model instead. But reading the manual did not answer my questions. So I took a class at the Junior College entitled " Image capture and Manipulation" Loved, loved the class! But, in the end  it was more about photoshop than how to use your camera which is what I was looking for.

Then I came across THIS tutorial @ Kevinandamanda.com
shazamm.
music playing..
birds singing...
I get it!


Here are a few just messing around shots I like.

I love the blurred out back ground effect. this tutorial was great about explaining how to get a great blurred back ground.


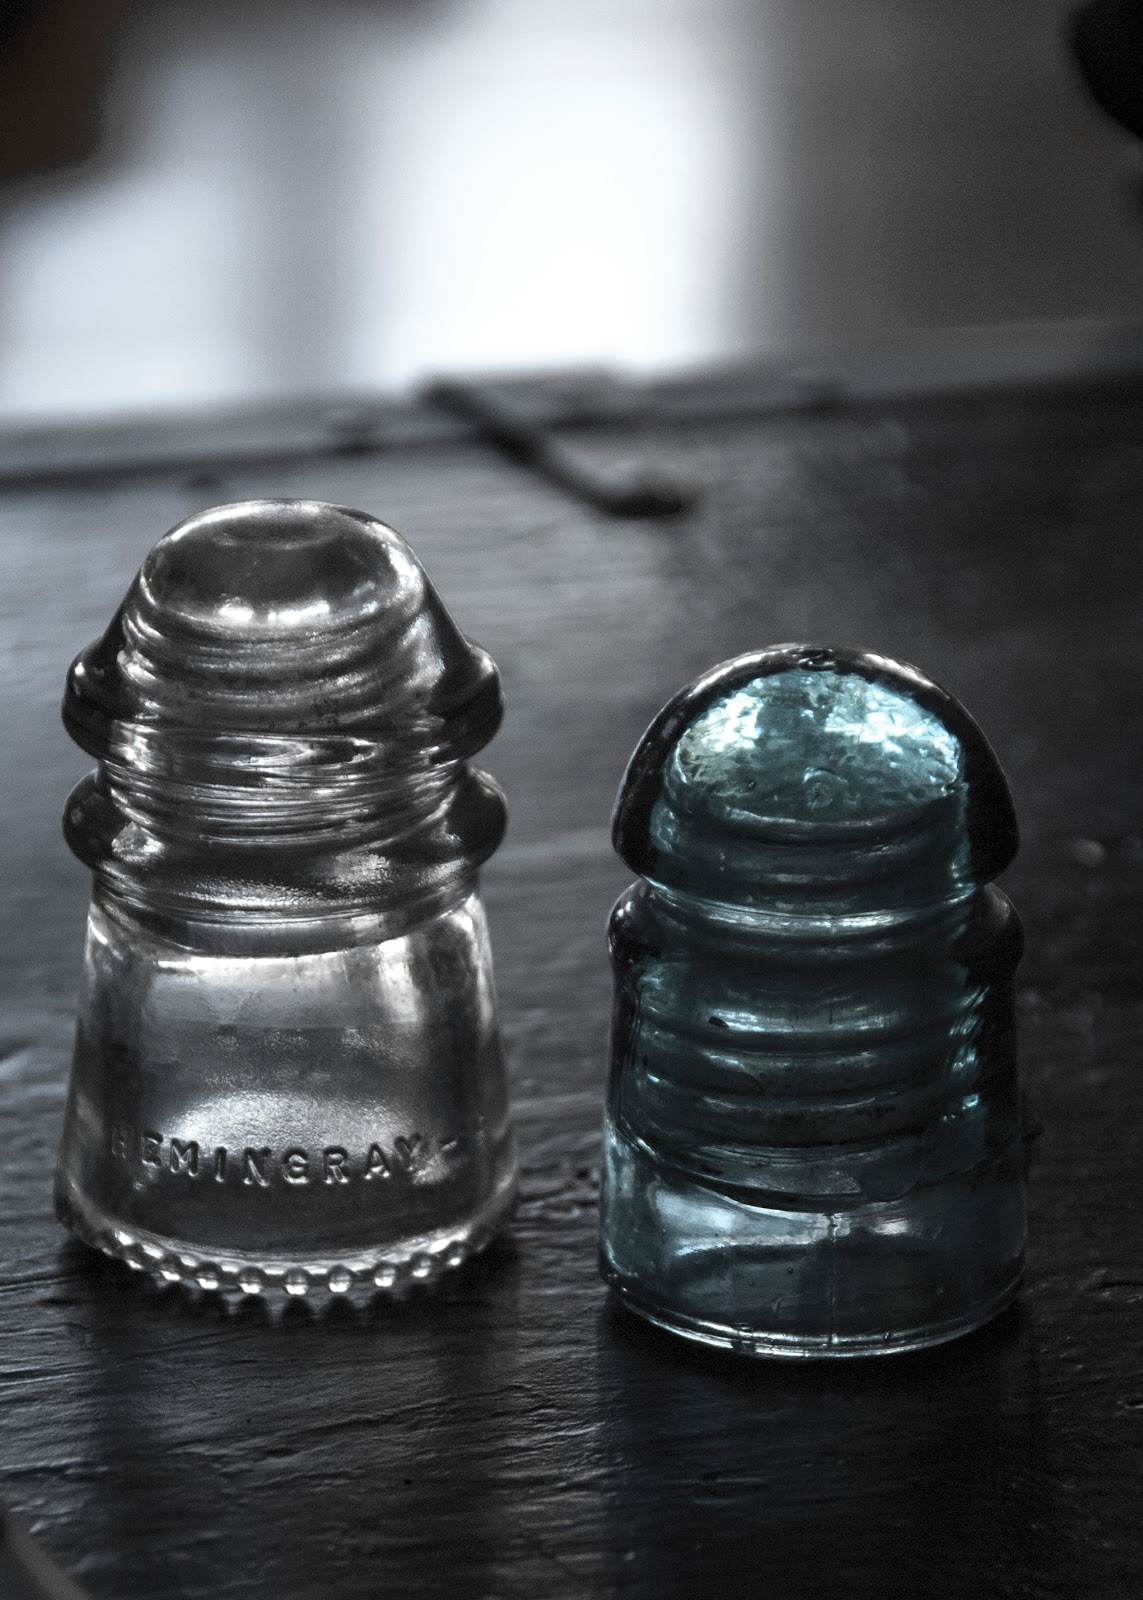
added in a little photoshop'ing techniques from before mentioned JC class.. this one I toned down the saturation to just before it turned black and white so that the blue would insulator would stand out a bit, but not to much 

I love the dark light in this photo.


and everything looks good as a black and white!
* I am not claiming to be any kind of expert on photography by this blog. Just a  humble someone who found something to make my hobby that much more fun and thought I'd share.

Hope you get a chance to check out the tutorial, and it helps. Especially if you are like me and just needed some answers/help to get it!

~ Bianca

Monday, March 5, 2012

Stencil Me in..


Scored this guy for x-mas , just another lovely to add to my collection of crafty books.


Here is one of the stencils from this beauty in action. I just used fabric paint that I bought at Beverly's ( i think it is abut 2-3$ a bottle) and the usual pouncing method for filling in stencils.( pounce- dabbing the paint on the fabric no swiping it..really technical stuff!)
Made some new pillow covers from some grey cotton fabric I purchased at Beverly's


and her we are after drying and ironing.

And here are my new pillows in there new home.


Oh, did I mention they had a TV stencil too..


and a Typewriter!! LOVE! Mixed in with my new Heart day pillows my couch is a happy place.

If you are curious on how I made the pillows HERE is a link to a past blog post on how to make pillows, or how I make pillows cause I would never say I that do anything the right way!

~ Bianca